|
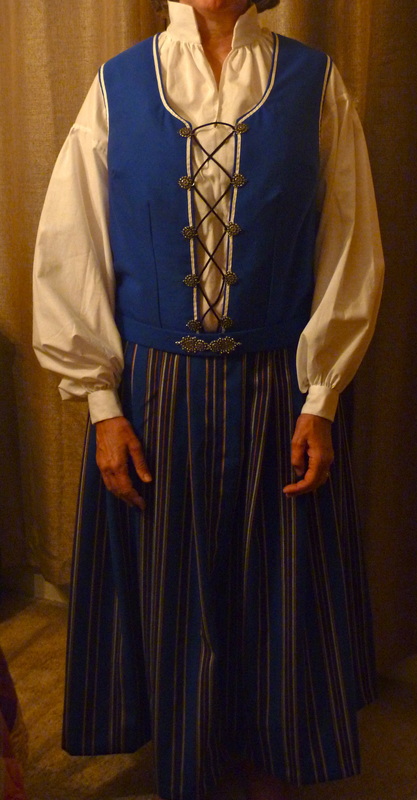
The bunad is completed, and I'm so excited to share final pictures of this project with you all! Without a proper model, the pictured proportions are a little off - but I thought it would be the best way to see the full effect: blouse, bodice, skirt, and belt. It's been so much fun to work on something with this much history behind it.
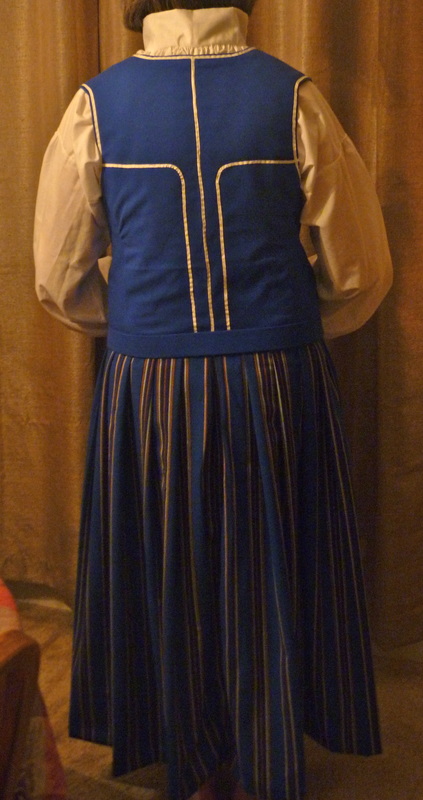
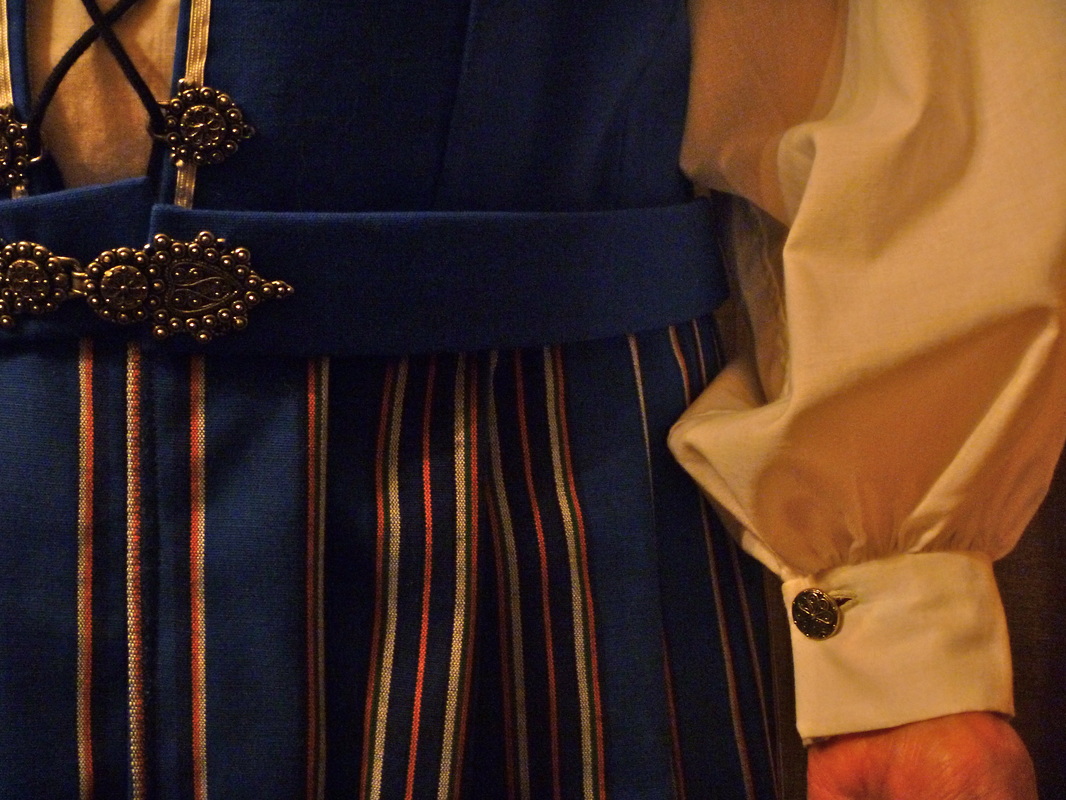 Skirt front, and sleeve, detail: The bodice and skirt are attached, with a continuous lap placket in the skirt, lined up with the bodice lacing. A separate matching belt finishes the ensemble. 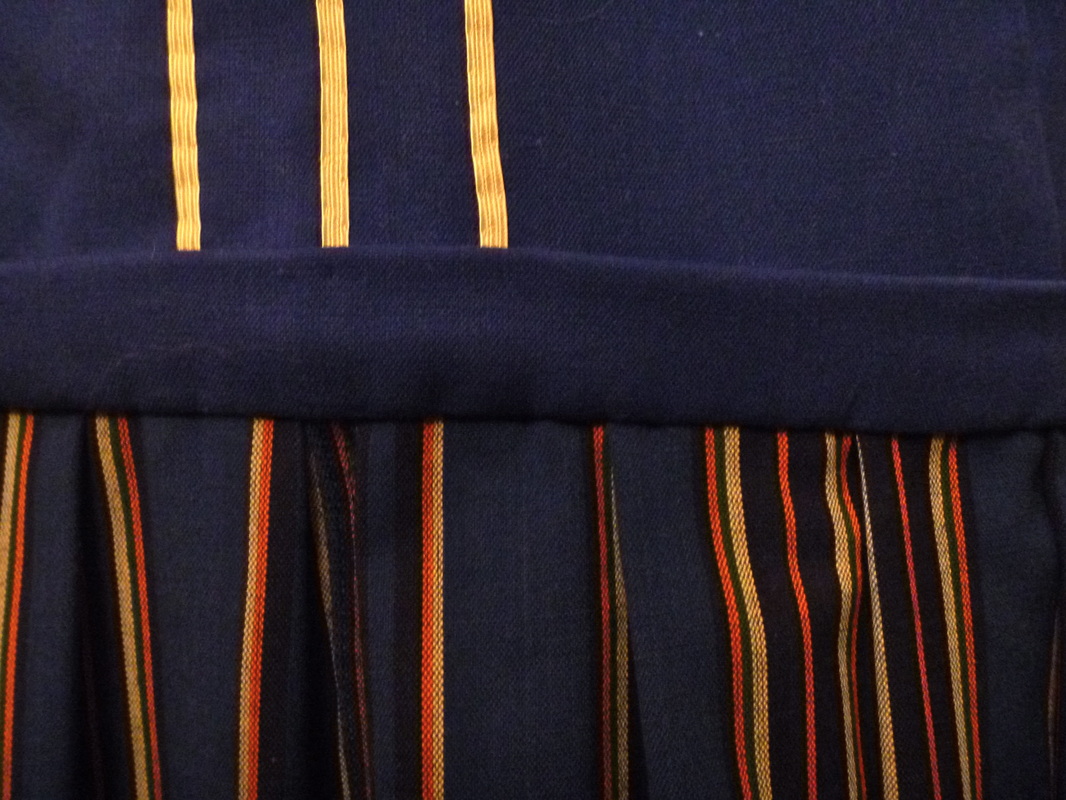 Skirt back detail: flat felled seams, the length is pleated towards the center back and sewn into a narrow waistband, which is attached to the bodice by hand.
0 Comments
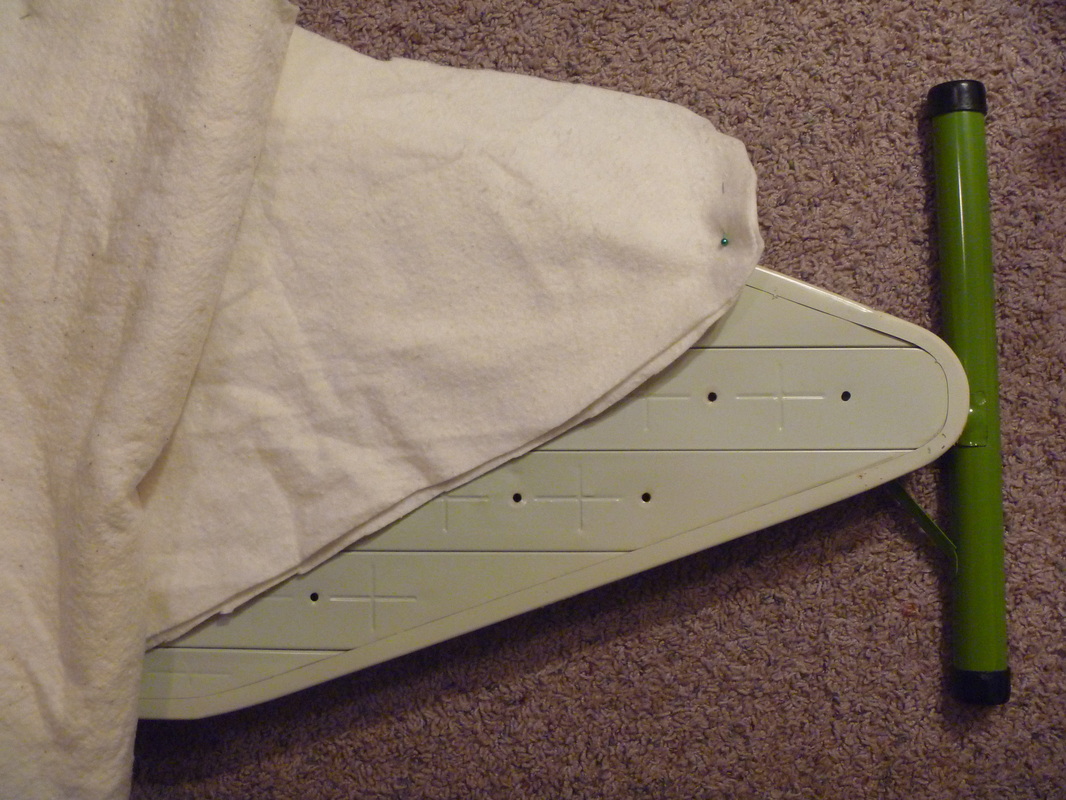
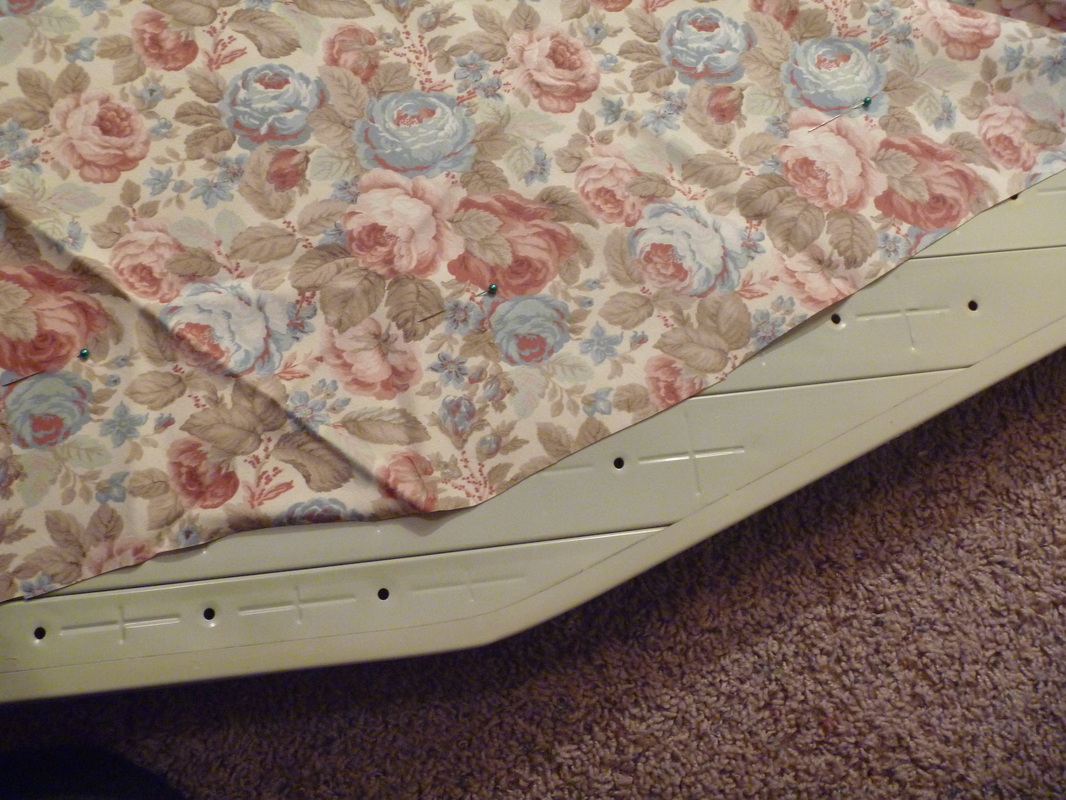
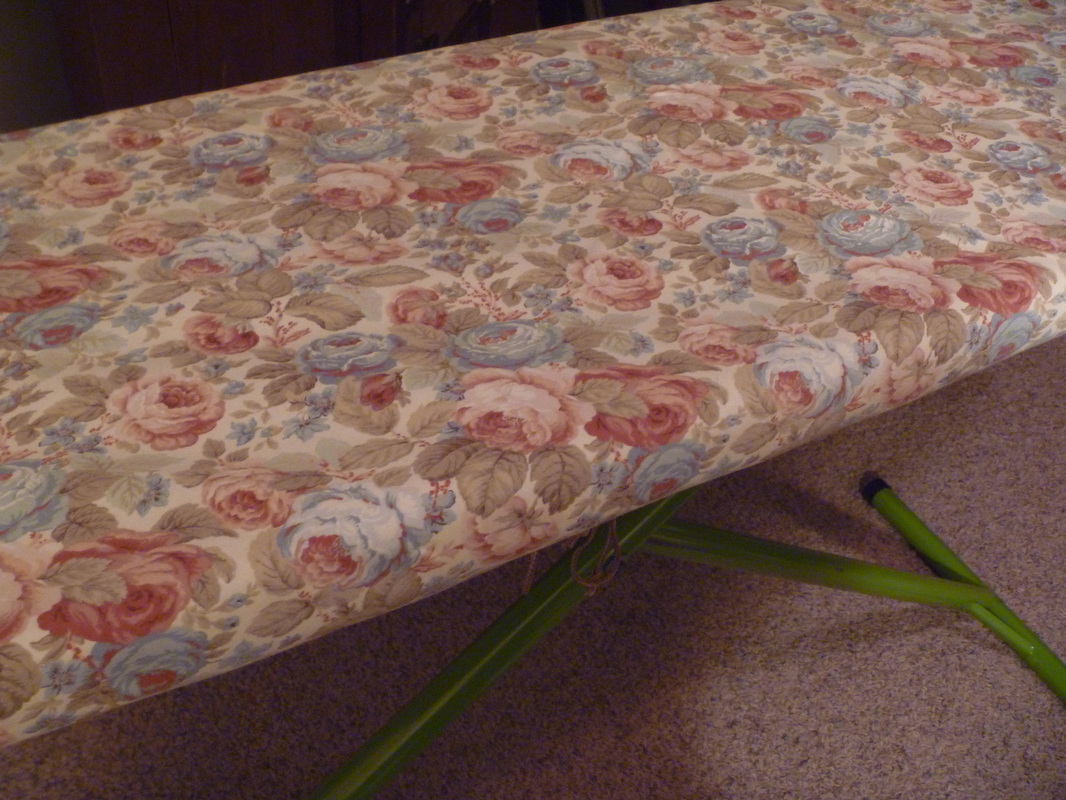
This was an easy, and probably long-overdue, project I tackled last week: recovering my ironing board. It's not something I normally take a lot of time to stop and look at. But with the sudden realization that it was starting to shred itself (!), I thought it might be time for a refresher. And it was a quick project with great results! First, I removed the old layers of the cover, which ended up being three separate pieces, between light padding for easier pressing, and the heat-resistant top cover. After a little research, I found that using all cotton materials would give me plenty of heat resistance and durability. Perfect, as I had long strips of cotton batting left over from my quilt, and a heavy cotton print just big enough to cover the board! I just used the board, laid upside down on top of the material, to measure the correct size: enough batting to cover the top and over the edges, and an inch or two larger of fabric to cinch around the board and keep everything together. (In retrospect, I would probably make this even a little larger - a few extra inches of fabric under the board would just keep it more stable.) I used a double layer of thin cotton batting, and I wouldn't go with any less padding than that. It needs some give for the pressing to go smoothly. (Pun intended, yes.) I zig-zag stitched around the outside of these to keep them lined up. The fabric got a simple double turned hem, creating a pocket for my drawstring. Once again, I had a thin piece of cord on hand that worked perfectly for this. I could have also gone with elastic, which would be easier to get on and off, but since the cording was there for me, it worked just fine. (And in the end, was probably easier to construct than getting the elastic stretched correctly along the entire edge.) Once I got it all lined up and cinched onto the board, it was ready to go! Voila, a lovely, fresh cover that actually adds something to the design of my little sewing room!
In honor of my new web design, and our beautiful summer, and - hey, who needs a better reason to celebrate than life itself? - over the next several weeks, I'll be holding a contest for FREE LABOR on a custom designed piece of your choice!
Here's the deal. You submit an idea for a garment you'd like me to make for you. A special event coming up? Need the perfect present for a birthday or anniversary? Always wanted a vintage gown but couldn't find exactly the right piece?The sky's the limit! I will select one project, and design and construct the garment for FREE. All you're responsible for is material costs. All submissions need to be in by midnight on Friday, July 4th, and the winner will be announced within a week. Spread the word and get your ideas in to [email protected]! Feel free to send descriptions, pictures, colors, whatever you have. Let the inspiration begin! I absolutely adored Lupita Nyong'o's gorgeous blue dress from the Oscars (like so many others). So when I came across a deep blue chiffon in - you guessed it - the S.R. Harris remnant bin, I decided to design a version of my own. 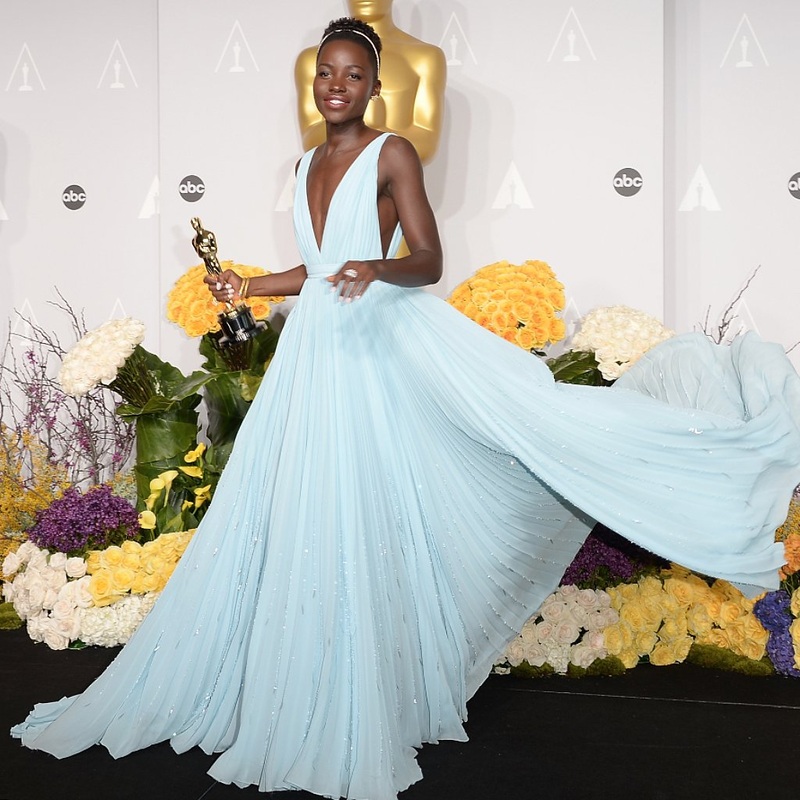
I take no credit for this photo.
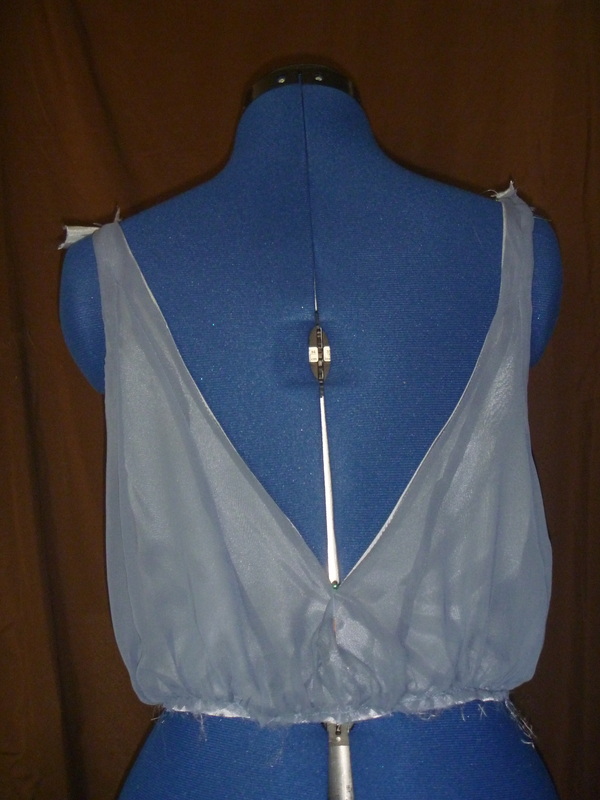
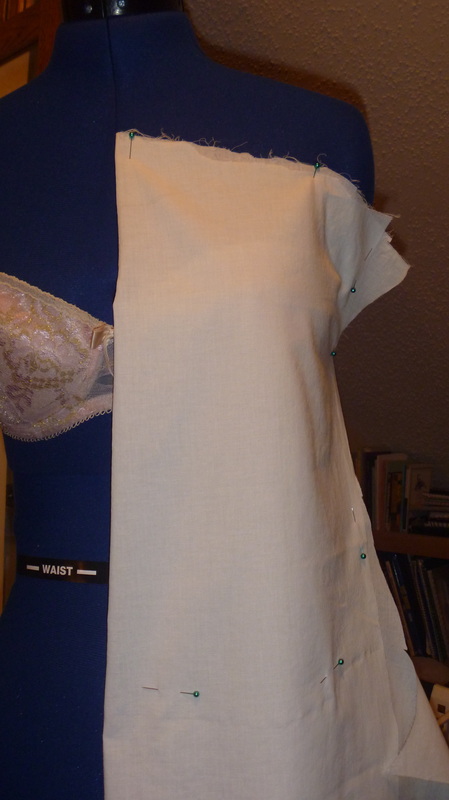
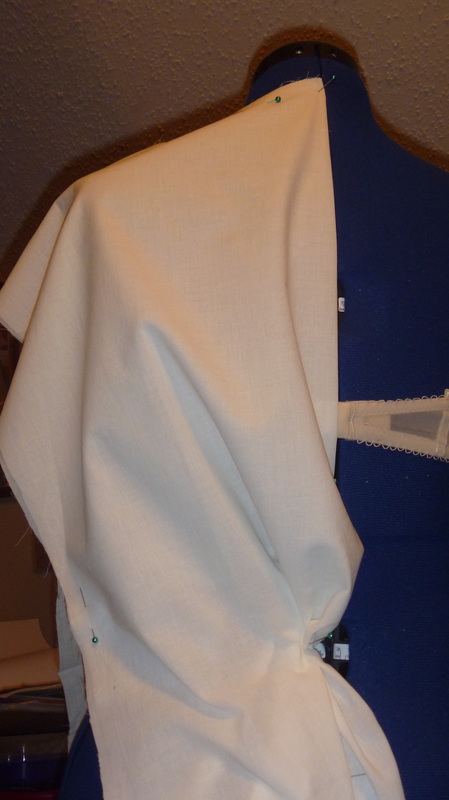
Mine would be a darker blue, as that is more flattering with my complexion, a little bit more covering in the bodice, and just around knee length. Unfortunately, I don't have many occasions to wear floor length gowns. I'm also going to skip the beading that trails down the skirt, again, to make it a little more casual. 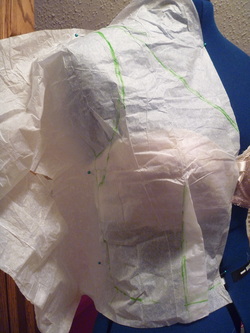 First step was to create a basic pattern for the bodice. I tried a technique I hadn't before, draping light tissue paper directly onto the dress form to draft the pattern. Here you can see the front piece. The lining will be fitted, and the chiffon overlay will be expanded along the waistline to create the gathering, with a little bit "blousier" of an effect than the original. Once everything was cut out, I took in the darts, sewed the front and back pieces together, and gathered the waistline of the chiffon. Finally, I attached the side and shoulders. Besides any finishing tucks and installing the zipper, the bodice is done! (Pictured here before the shoulders were finished.) As you can see, using a lighter shade of lining creates a shimmery finish.
Next steps are to french seam the skirt gores and finish the waistband. Part 2 coming soon!
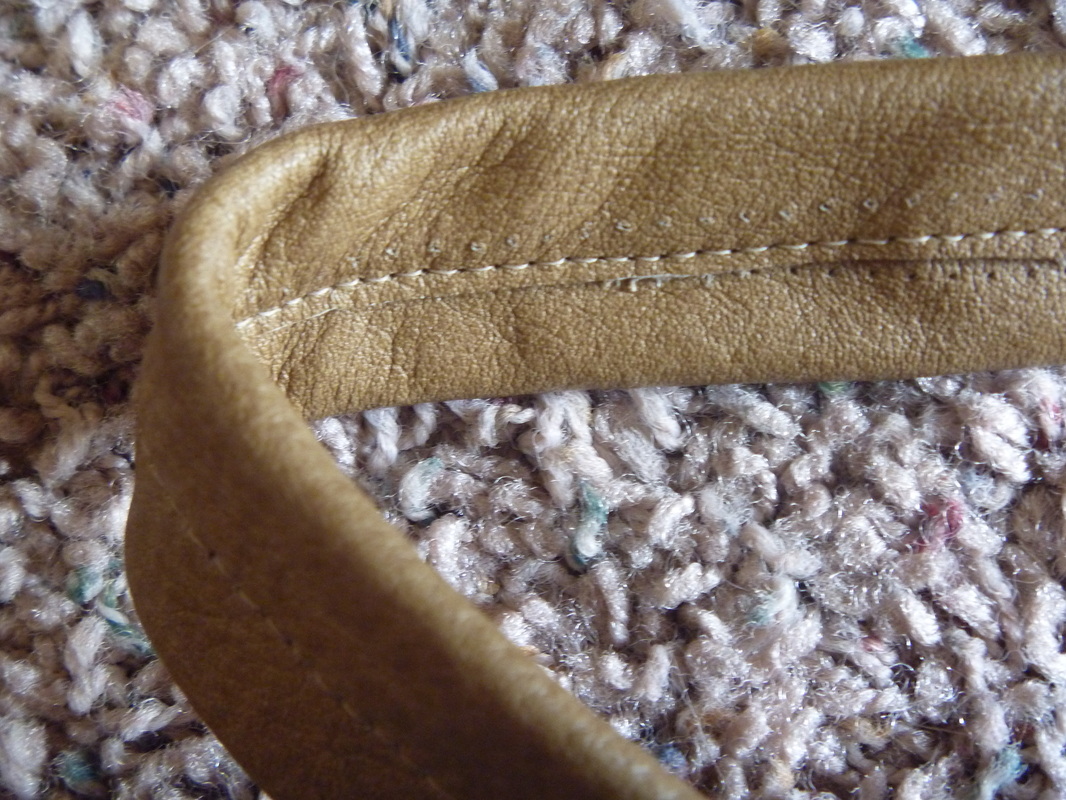
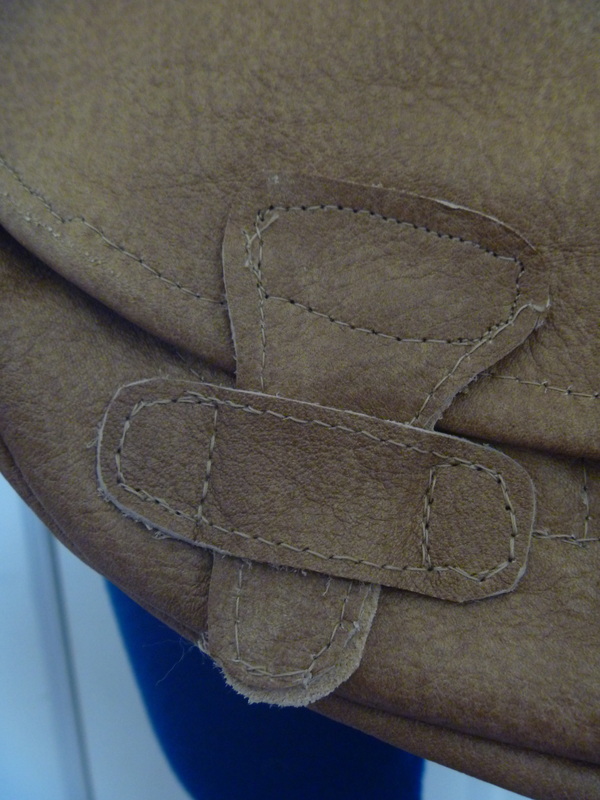
Remember this guy? If you haven't seen Part 1, check it out here. It's finally finished! And I'm so happy with the result. 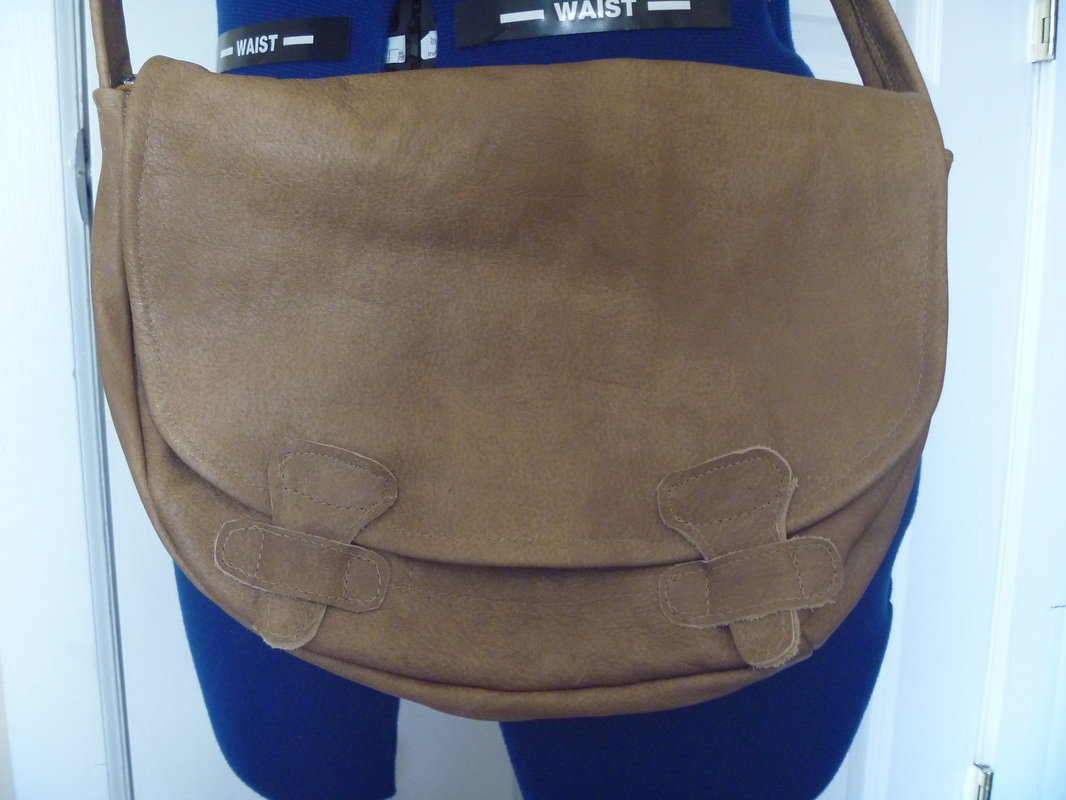 You might notice that it looks a little different than it did at the beginning - namely, there's a different kind of thread. Besides patience, another absolute necessity in successful sewing is being willing to admit a mistake and go back and do it again, and sometimes again and again and again. Seam rippers are very handy tools. Never was this more true than on this satchel. I started out stitching the body of the bag by hand, using a saddle stitch and heavy contrasting thread. That looks like this: 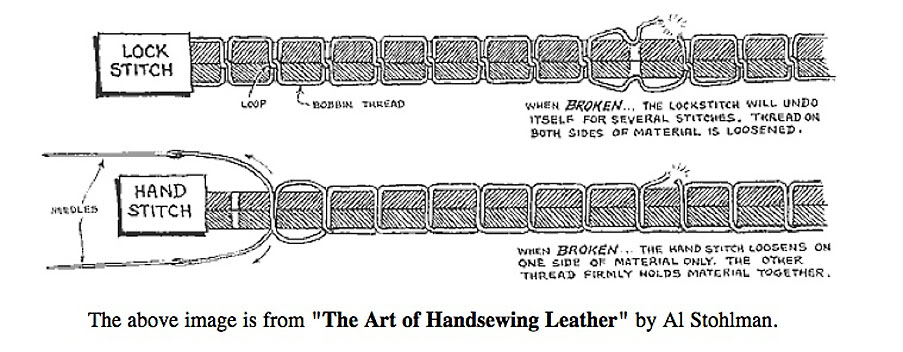 I was so excited about this, because like it states above, it's sturdier and gives a really nice look on leather items. However. After a number of hours of this, I took a mental step back to check it out. And I didn't really like it. On top of that, I couldn't figure out how to best stitch the long strap seams since originally, I didn't want to topstitch at all on the bag exterior. And then I made a discovery: this leather was indeed stitch-able on my machine. (It's more supple than many leathers, and I used an extra heavy weight needle.) So after several weeks - yes, weeks - of consideration, I decided to take everything apart and re-stitch it all with a matching thread on my machine.
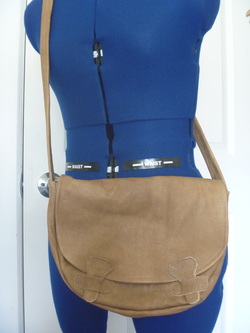 The perfect size for what I need, with a top zip closure and crossbody strap, so it's easy to bike or walk with. It make me excited to start traveling! No, it's not perfect, and some of the original hand sewing holes are visible. But for my first attempt at working with leather, I'm very excited about the result!
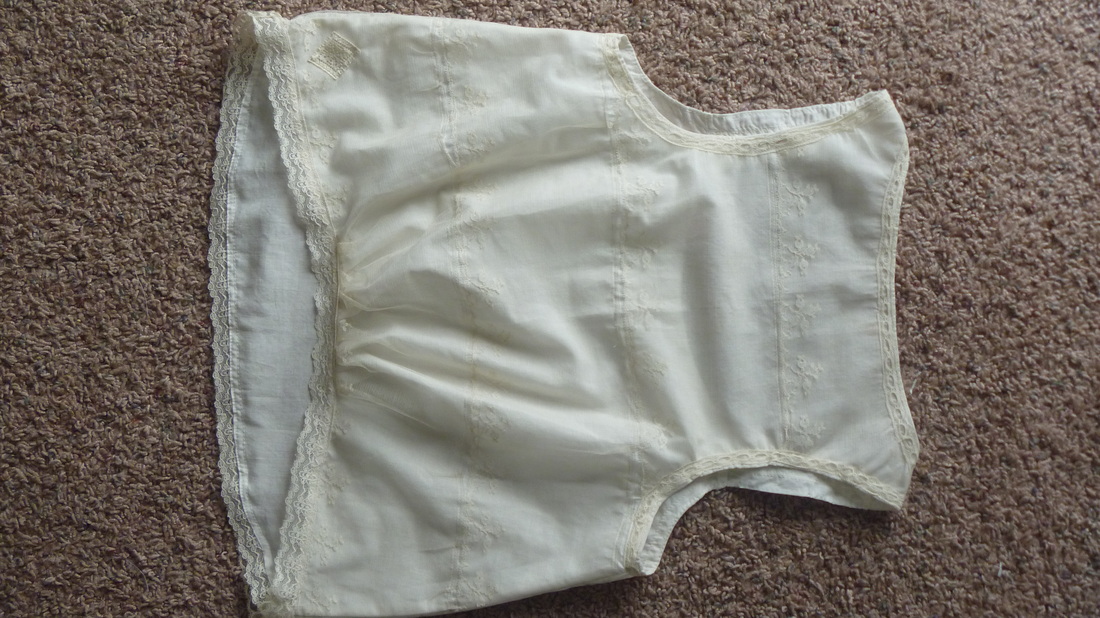
Happy Spring Break! Or as a friend of mine put it, Thaw Break! Remember my fascination with "running through the meadows" clothes? Maybe I should start to advertise it as a specialty - I just can't resist light cotton and vintage - looking lace. And this is no more true than for this piece, an airy cotton crop tank perfect for a summer evening out or maybe even a fun pajama top. Read on for lots of detail pictures and a few fun finishing techniques! I made this completely from scratch without a pattern, so I started by draping the cotton on my dress form to draw out the major lines and shape. As the cotton I had on hand was a pretty small piece, I also needed to make sure it would fit! I had a few garments in mind I was modeling it after. The biggest detail to pay attention to at this stage was the gathering I wanted along the back hem.
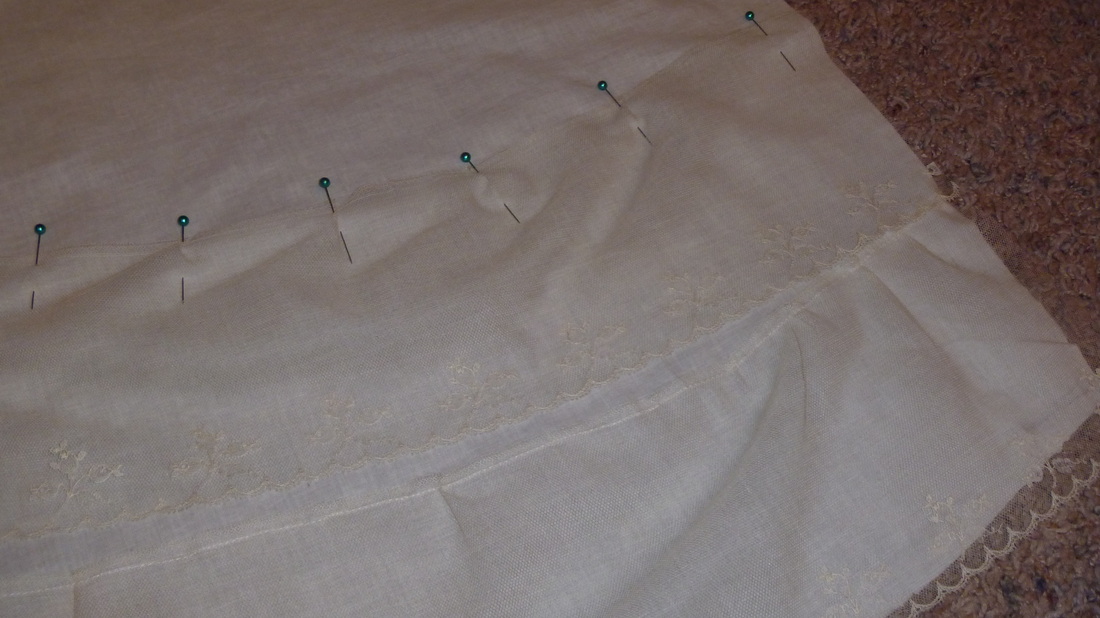 Once the pieces were cut out, the next step was the lace overlay, which would cover the whole thing. Tiny pin tucks helped shaped the wide lace to the curves of the front. I attached the main lace pieces before sewing the side seams, to keep them a little neater. It was the finishing touches that took the most time and attention for this piece. Check out the captions below each picture for more explanation! 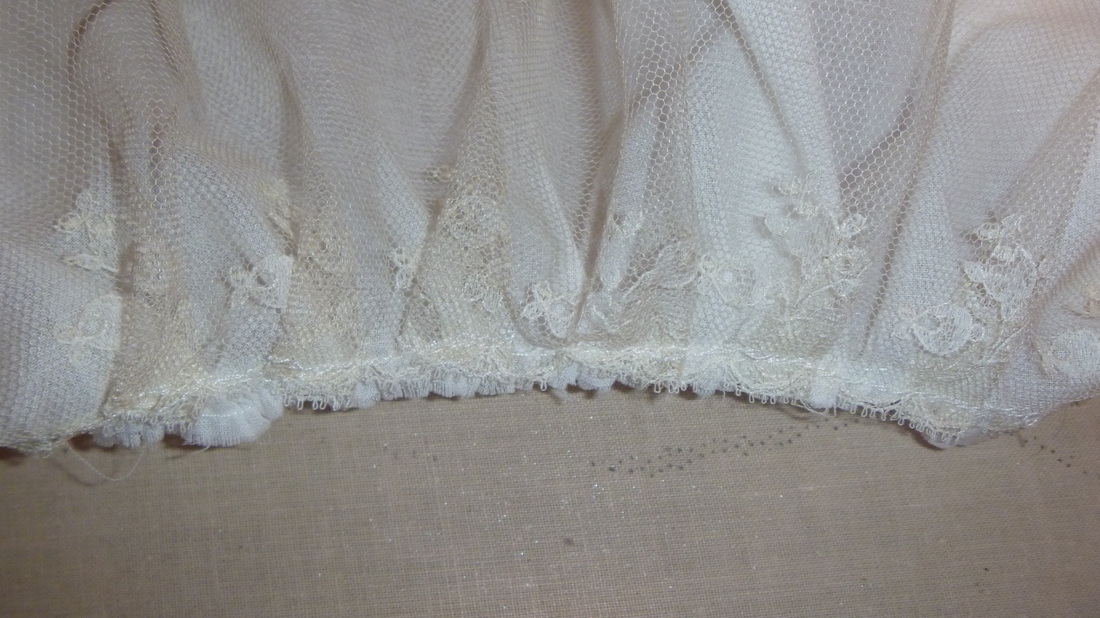
I gathered the cotton under layer in the center of the back cotton hem, and made small pleats in the lace over it.
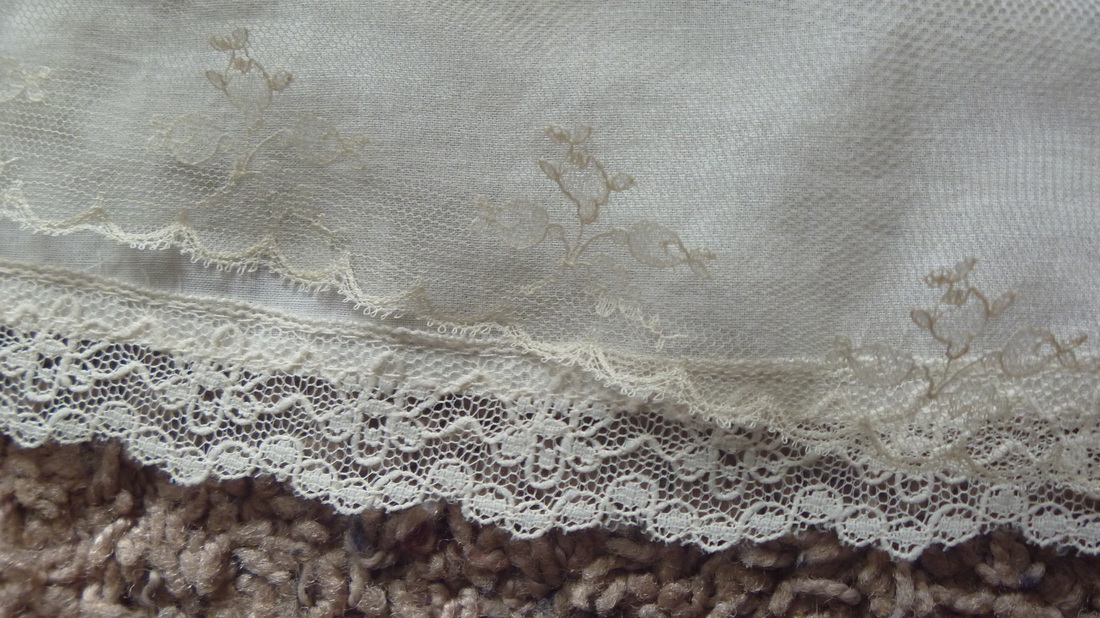
A thin piece of lace finishes the bottom hem - and the wide lace on the front makes a second sheer layer over it.
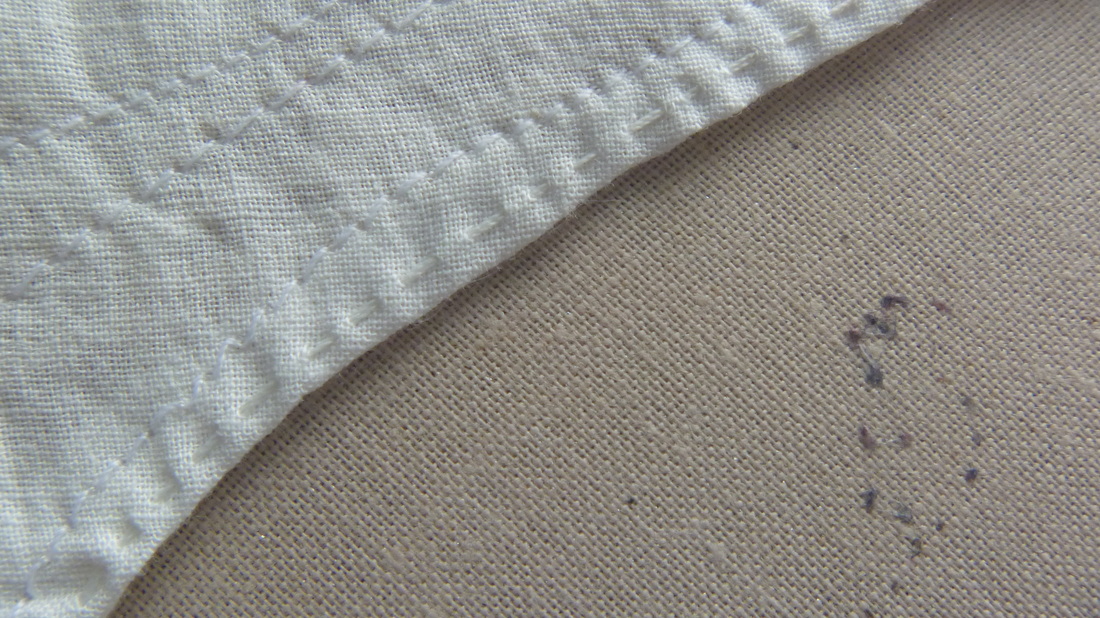
I wouldn't say this is exactly a recommended technique, but the neckline and armholes got a little stretched out, so I ran a fine gathering stitch right along the inner edge so it would lay flat against the body.
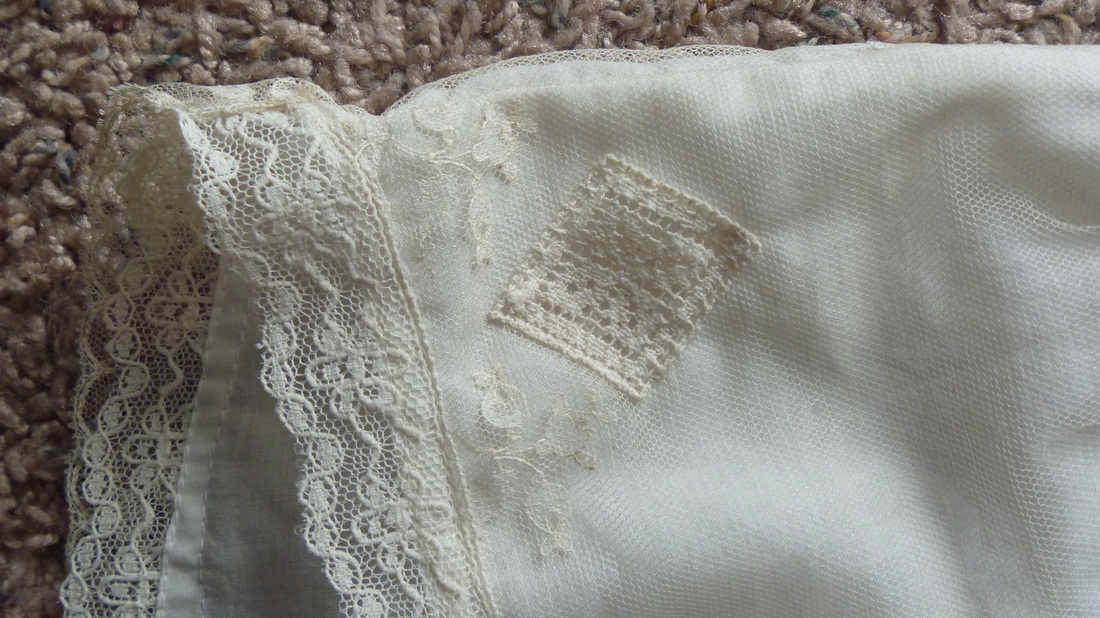
As a unique touch, I added a small vintage lace piece to the bottom back hem. It's all in the details!
And the finished product, front and back! I tried to turn the pictures right side up - but it's not cooperating today. Now I just need to find the patience to wait until it's a little warmer to wear it! 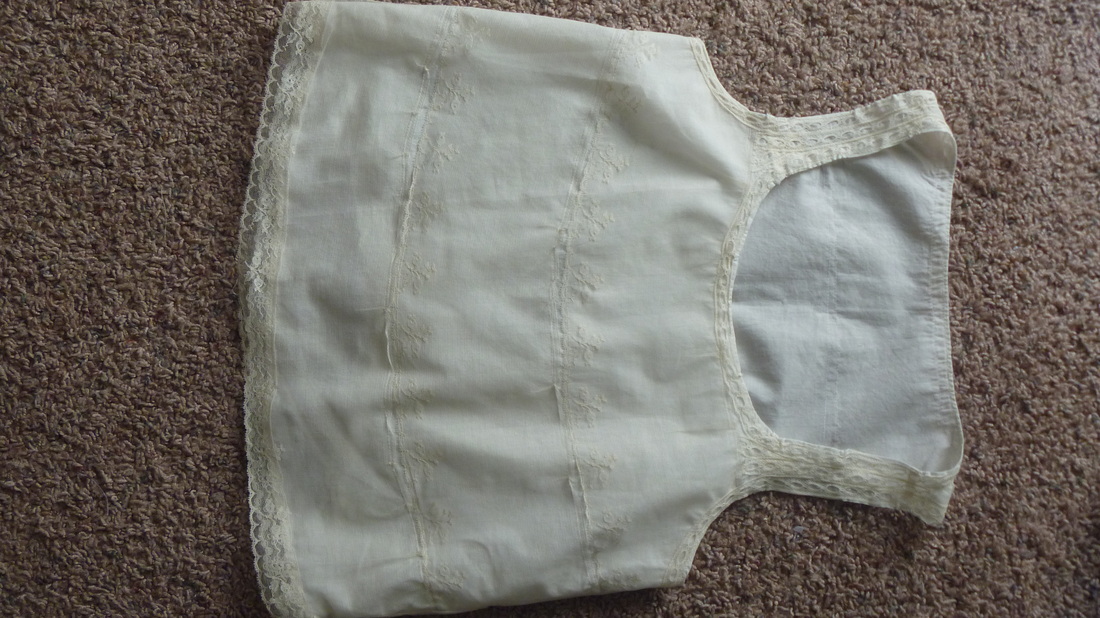
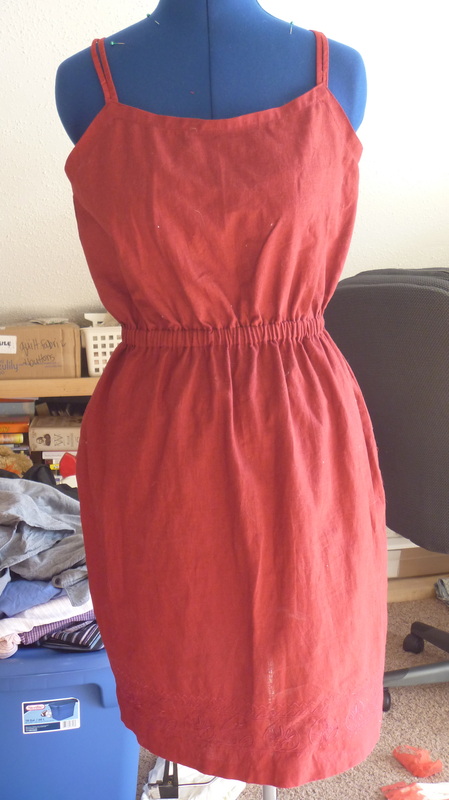
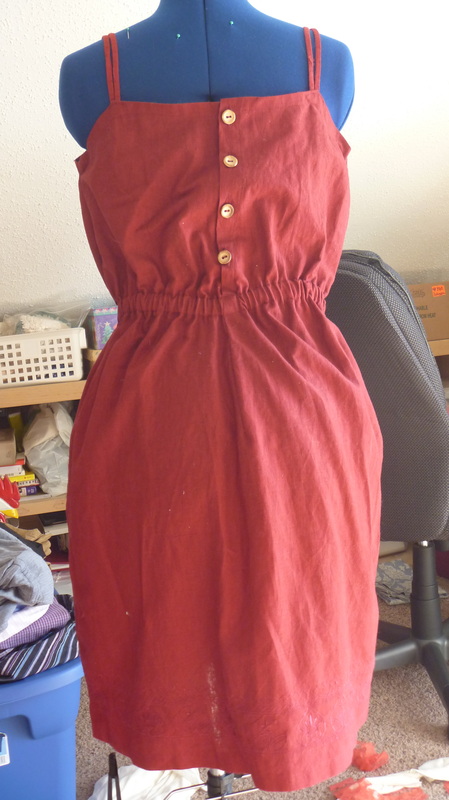
 Nothing like a good Minnesota blizzard to get me in the mood for spring! But really. It's been a long, cold winter here, and although it's finally been consistently above zero for the last few weeks, it's definitely not feeling like spring is coming anytime soon. I don't know about anyone else, but I sure need some hope that I didn't step into Narnia, pre-broken curse! When I was thrifting last weekend, I found this skirt, and immediately saw a sundress taking shape before my eyes. Besides being a beautiful color, it has a subtle and lovely embroidery pattern around the hem. And until July when the snow starts melting, I can wear it with a sweater and leggings and boots and a scarf...  Here, I already removed the drawstring and elastic from the waistband. Next was fitting it on my dress form, marking out darts and the new neckline. The most complicated part was adding a button placket to the back. By bringing some of the extra skirt width to the back, I was able to create a double layer on both the side where I sewed on the buttons, and the flap I put buttonholes in. A confession: until now, I hadn't ever made buttonholes on my current machine. I usually make thin fabric loops for the buttons, but this time, I decided it was time to give it a shot. I can't say the results were stunning, but I'm definitely improving.  Finally, I added a casing around the waist for elastic, and used the drawstring that had been in the waist as straps. Looking forward to brighter, and warmer, days ahead!
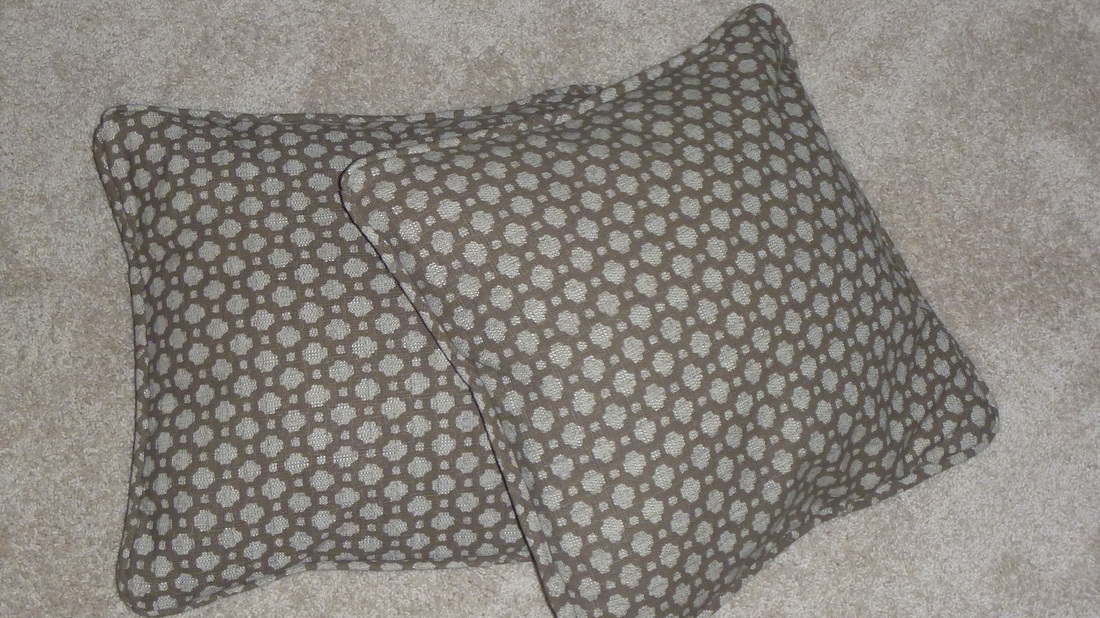
With moving into a new house a few months ago, I'm just finishing up my last few decorating projects. One was recovering a pair of throw pillows for the living room couches. I found this fabric on a great clearance, and it coordinates with our new colors much better than the current covers. 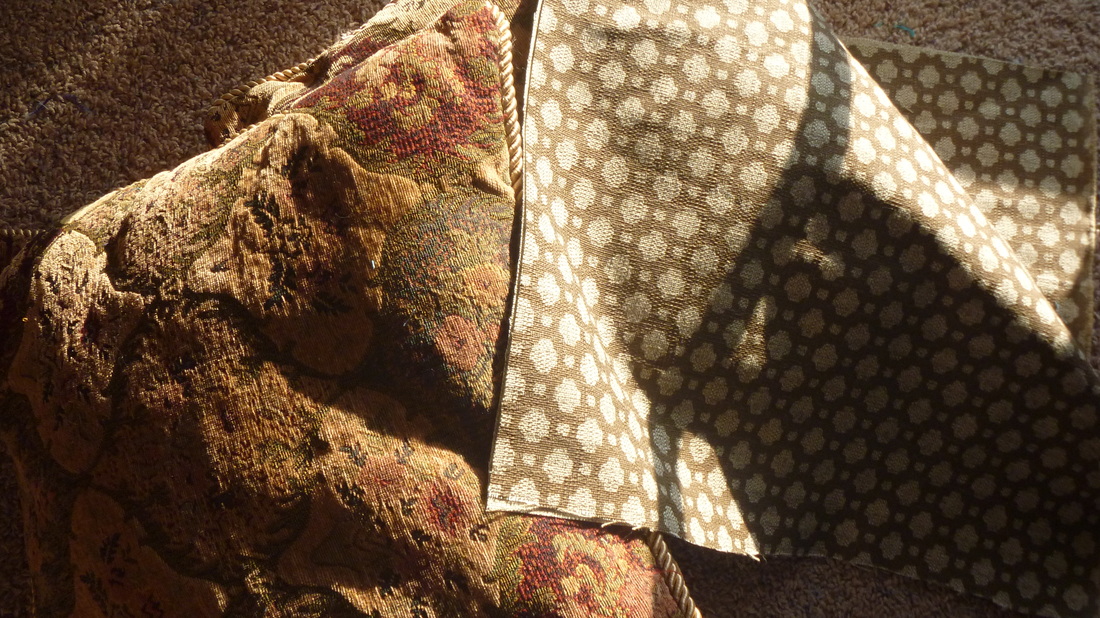
After cutting out the two sides, I wanted to add a simple binding trim around the edges, similar to the original cording, but matching the cover fabric. I cut lengths of the extra fabric on the bias, sewed the lengths into a long tube, and threaded a thin cord I had on hand through it to give it a little more bulk. I then simply pinned it into the outer seam and sewed everything together. A very simple project, and I was quite happy with the results! 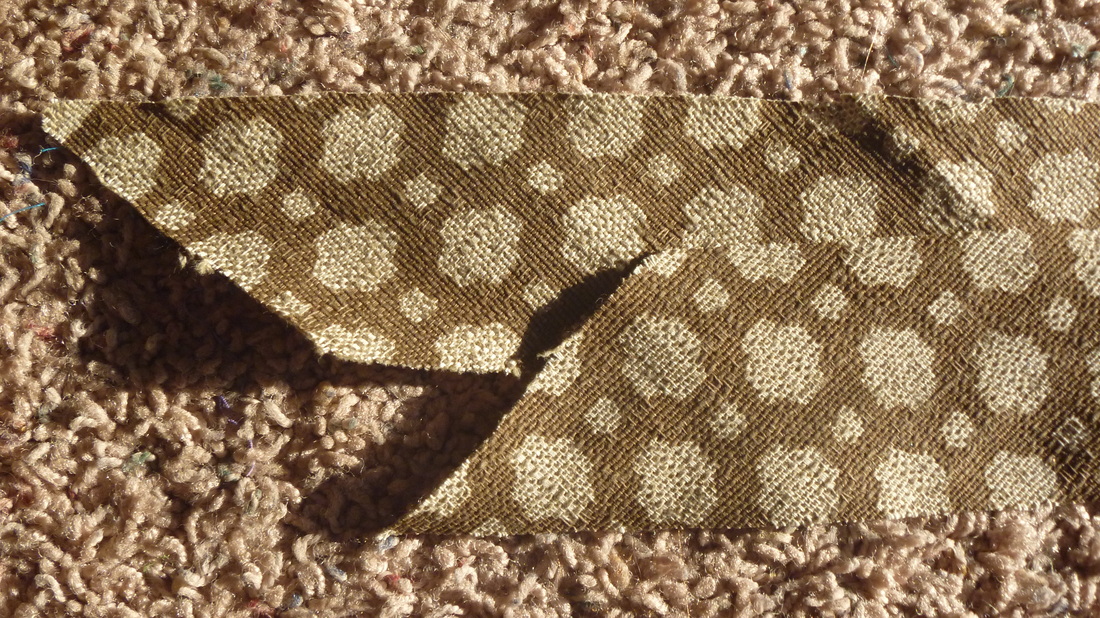
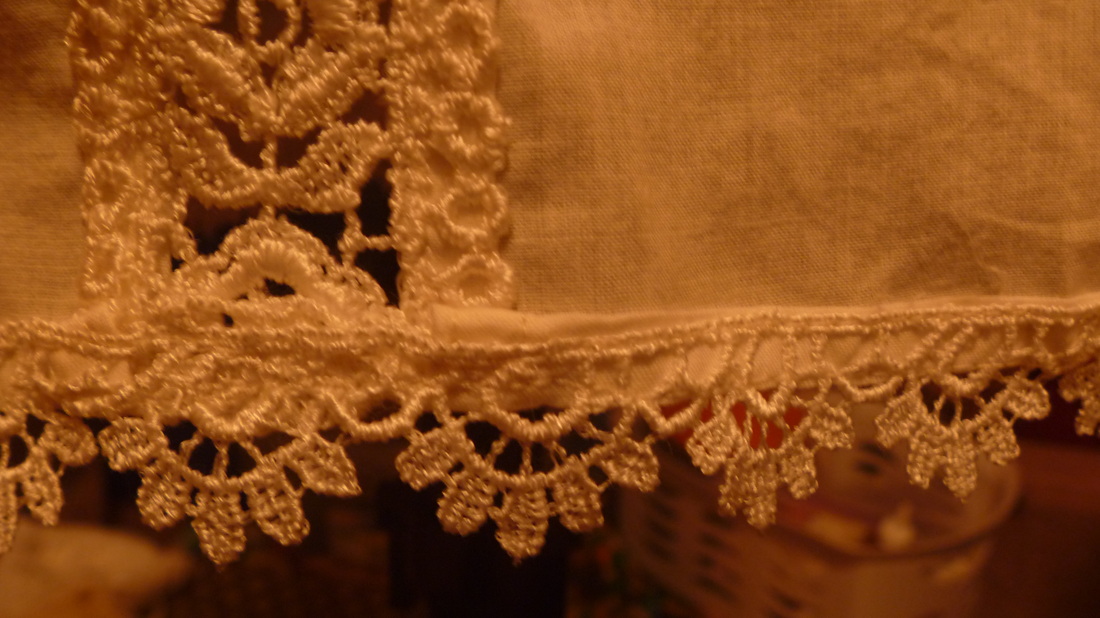
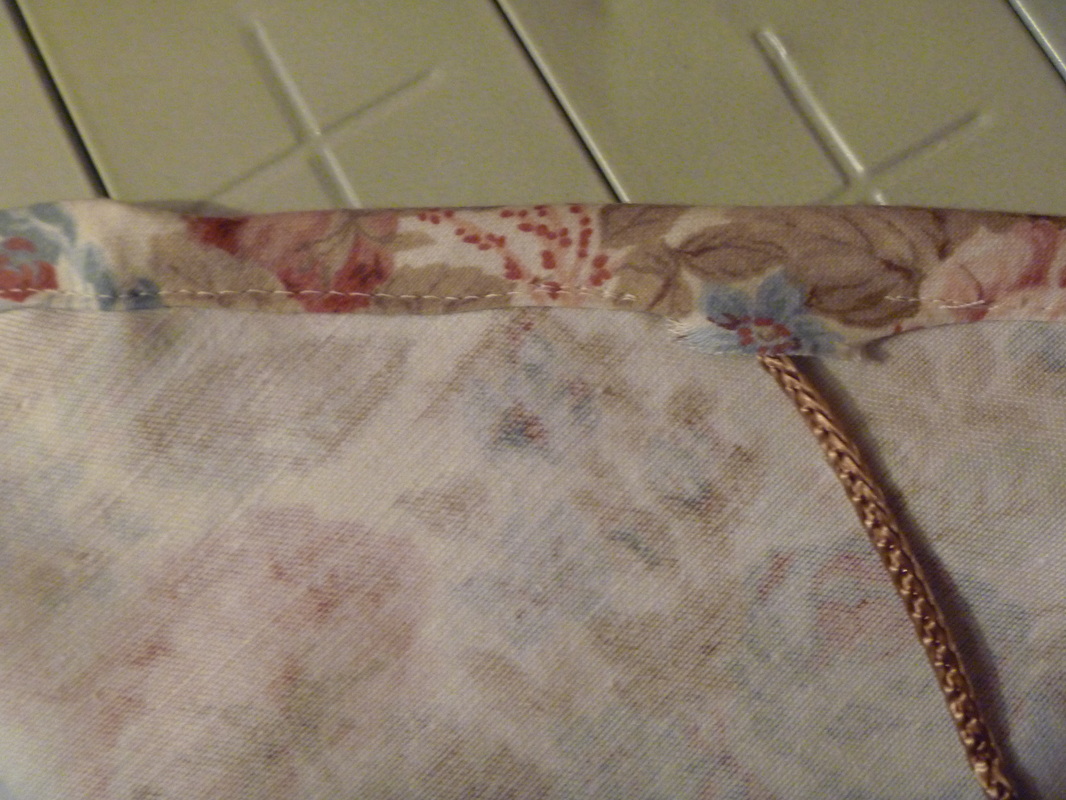
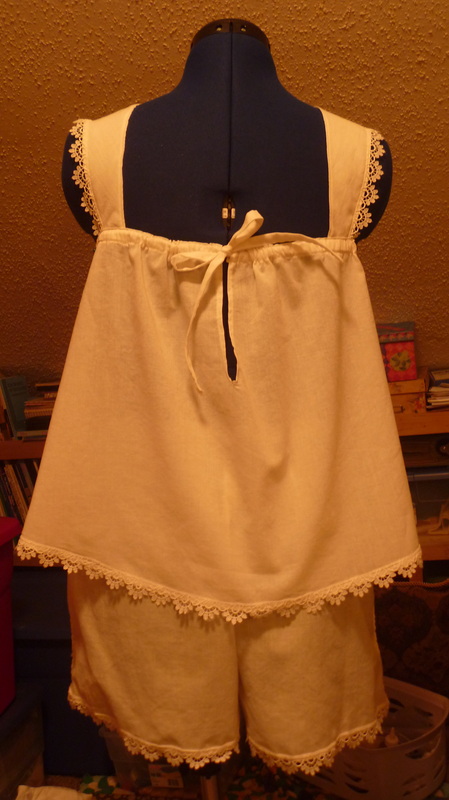
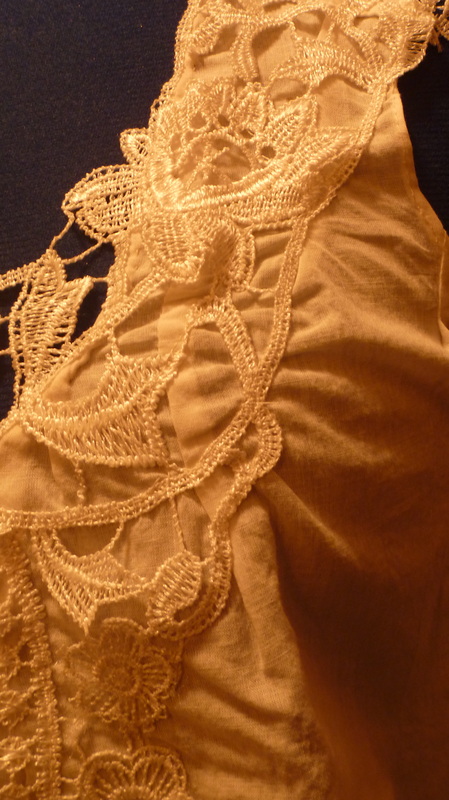
Karena Design is officially launching a new project line! For a long time, I've wanted to experiment with creating custom lingerie. It might have a bit of a trashy reputation in some circles, but I really believe that beautiful lingerie in the right context can be classy, flattering, and just really fun to wear. I find the best inspiration in vintage styles. My first piece, a little sleeper set, was originally inspired by a lovely vintage set, and specifically designed as wedding lingerie. 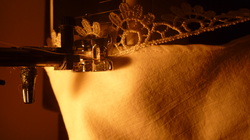 I've always loved light, lacy things. Sometimes I call them "running through the meadows" clothes, although this finished product probably wouldn't be worn outside. I started with a fine ivory cotton voile, and an assortment of laces. I designed this set from scratch, just using a pair of pajama shorts as a loose pattern for the bottoms. I finished most of the edges of this piece with lace, so while most interior seams were french seams, hems and insets were a little more complicated. 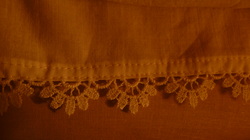 For intimate apparel, it's imperative that it's elegant and comfortable inside and out. For wider lace edges, I usually double turn the hem up on the right side, the opposite that I normally would. I then sew the lace over it, with one seam right above the turned up edge and on the top edge of the lace, and a second seam just at the bottom edge of the garment. For thinner lace, like the scalloped piece I used in several places on this garment, I double turn and stitch a hem as normal, then use a fine zig zag stitch to sew the lace right over the seam. And for a lace inset with a curved edge, like the bodice inset on this garment, I started by tacking and stitching down the lace piece on top of the bodice, then cutting away the unneeded fabric. For the neatest finish on the inside, I turned under these raw edges and stitched them by hand. Whew! 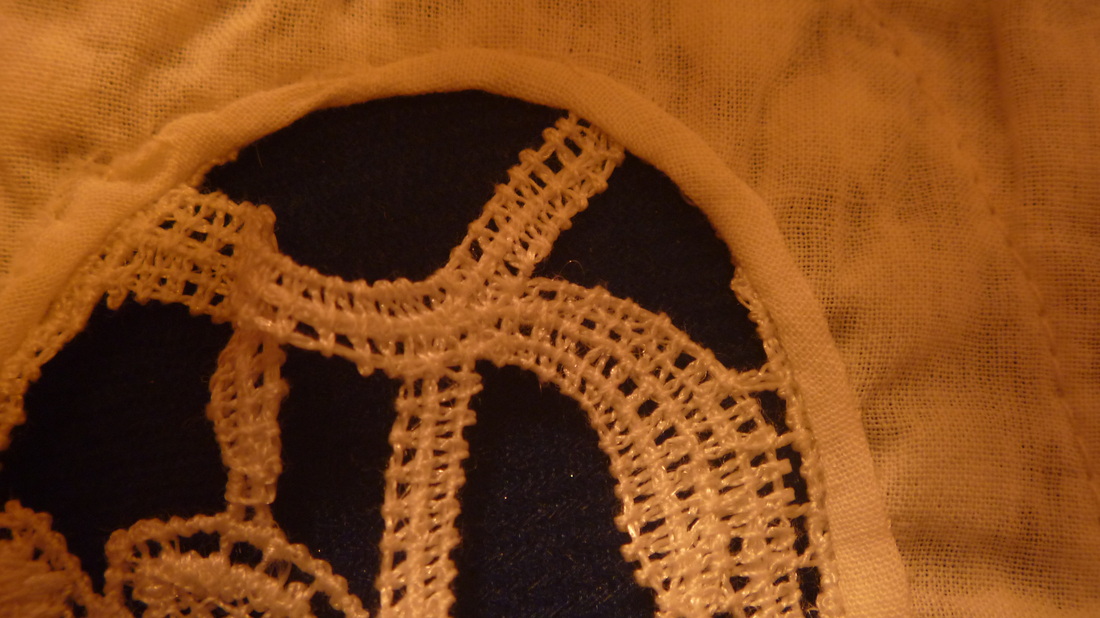 But even with all of the detail work, a lightweight cotton is easier to work with than say, a chiffon or other slippery or stretchy fabric. As I continue to design lingerie pieces, I'll be branching out into different materials, but for this piece, I enjoyed working with the simplicity of cotton. And I was very pleased with the finished product! The hardest part of lingerie is fitting precisely to a woman's curves - because even in a looser garment like this, the idea is to give as flattering of a fit as possible! Since I didn't use any elastic, I put a thin drawstring at the top of the shorts, and another in the back of the tank. I did the rest of the fitting with small darts along the neckline, that I then eased into the lace inset. And now here we are! 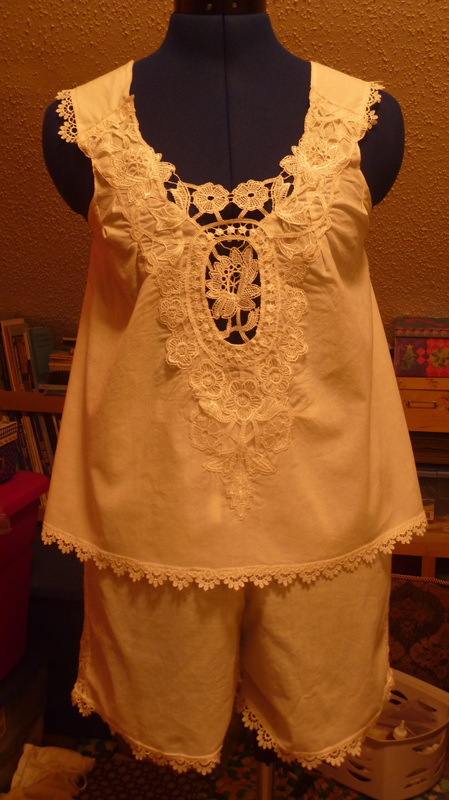
 Hello friends! In the middle of moving across the city this fall, I've been working on a fun alterations project. I was given an old men's sport coat made of a really fun tweed wool. It's a little hard to see in a picture, but it's a mixed brown/gray with all sorts of interesting undertones that come out in the sunlight. And it's nice and warm, perfect for the our snowy Minnesota winters. 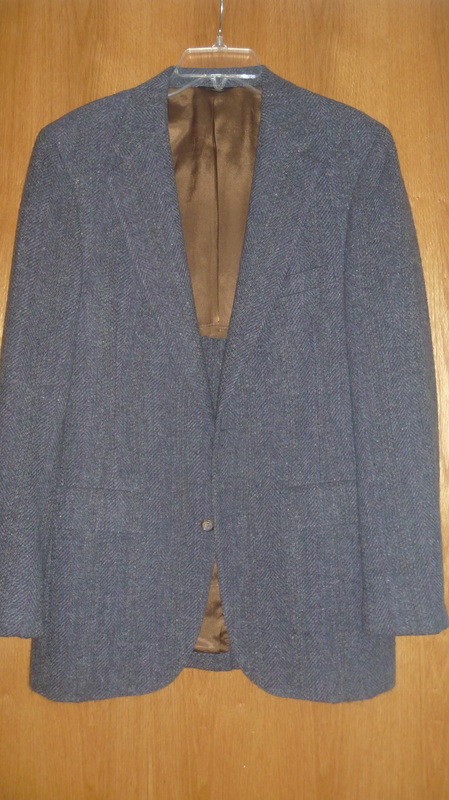
Resizing a structured piece like this takes patience - especially when not only changing the size, but the gender. I brought in almost every seam, darts, shoulders, and arms, at least a half inch, removed the pocket flaps to make it a little more feminine, and brought the hem up several inches. The final touch will be new buttons for the front, and contrasting elbow patches to make it a little more unique. Another great bonus of this piece? It goes with both black and brown. 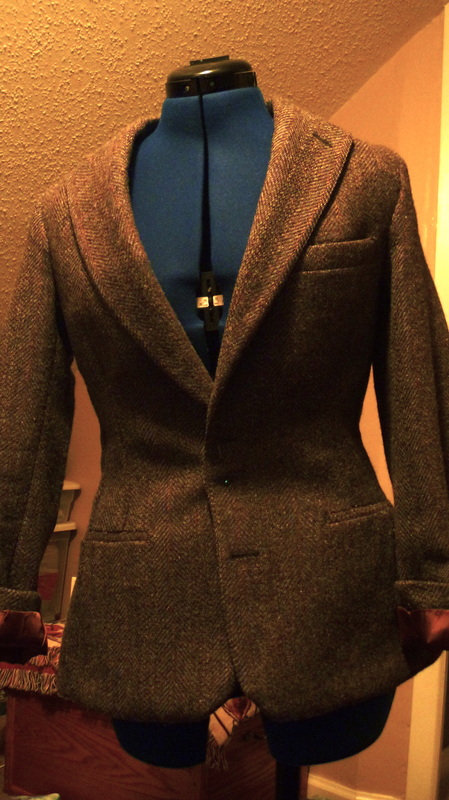
And there's the (very nearly) finished product! Up next? Another dance recital collection, this time more of a traditional dress, and then a really fun bridesmaid dress alterations project. And of course Christmas is coming! I better get started on my gifts!
|
Design BlogThis is the place to find projects in process and get a glimpse inside of my work. Archives
December 2020
Categories
All
|

 RSS Feed
